Make Your Sink Sparkle With This Easy Nighttime Hack
While your sink endures daily grime from dishes and spills, a simple nighttime hack can transform it into a sparkling centerpiece. You’ve got the power to banish buildup with minimal effort—just a few household items and ten minutes. Start by clearing the clutter, but don’t stop there. Stick with this guide to uncover a method that ensures a fresh, hygienic sink by morning.
Key Takeaways
- Clean your sink at night to prevent grime buildup and wake up to a spotless kitchen.
- Gather essentials like white vinegar, baking soda, and a microfiber cloth for effective cleaning.
- Clear the sink area of dishes and clutter for a smooth cleaning process.
- Apply a fizzy vinegar and baking soda paste, letting it soak for 10 minutes.
- Scrub gently, rinse with warm water, and dry to achieve a sparkling shine.
Why a Nighttime Cleaning Routine Works
Why should you consider cleaning your sink at night?
It’s the perfect time to establish a sink cleaning routine that fits seamlessly into your day.
After dinner, your sink’s likely full of dishes and grime, so tackling it then prevents buildup.
You’ll wake up to a spotless kitchen, reducing morning stress.
Plus, nighttime cleaning means the sink dries overnight, avoiding water spots or mold.
Make it a habit—wipe down surfaces, scrub stains, and rinse thoroughly before bed.
This practical sink cleaning routine ensures a fresh start every day, keeping your kitchen hygienic and inviting with minimal effort.
Implementing a quick nighttime cleaning hack before bed can transform your sink into a sparkling centerpiece by morning.
Gathering Your Cleaning Supplies
Dive right into preparing for your sink cleaning routine by gathering the essential supplies you’ll need. Grab a pair of rubber gloves, a microfiber cloth, white vinegar, baking soda, and a scrub brush. Keep these items handy to tackle grime effectively. Check out this table to feel inspired and ready to transform your sink into a gleaming masterpiece. This simple hack using white vinegar and baking soda will revive your sink’s shine effortlessly.
| Supply | Purpose | Emotion Evoked |
|---|---|---|
| Rubber Gloves | Protect your hands | Safety and confidence |
| White Vinegar | Dissolve tough stains | Hope for a clean sink |
| Microfiber Cloth | Polish to perfection | Pride in your work |
Clearing the Sink Area First
Before you start scrubbing, clear out the sink area to create a clean workspace.
Remove any dishes, utensils, or clutter from the sink and surrounding counter.
Stack dirty items in a neat pile away from the area or load them into the dishwasher if you’ve got one.
Wipe down the counter with a damp cloth to pick up crumbs or spills.
Check for stray sponges or soap bottles and set them aside.
A clutter-free zone ensures you’ve got full access to the sink, making the process smoother and more effective.
Keep everything organized before moving forward.
This preparation step is crucial for an effortless sink shine transformation using simple household items.
Applying the Cleaning Solution
Start by mixing your cleaning solution in a bowl, combining equal parts vinegar and baking soda until you’ve got a fizzy paste.
Grab a sponge or cloth and spread this mixture evenly across every inch of your sink, making sure you cover all stains and grime.
Let it soak for at least 10 minutes to break down tough buildup before scrubbing.
This simple method ensures a sparkling clean appearance with minimal effort every time.
Mix the Solution
How can you ensure a spotless sink with minimal effort? Start by mixing a powerful cleaning solution right in your kitchen. Grab a bowl, pour in 1 cup of white vinegar, add 1 tablespoon of baking soda, and mix until it fizzes. Stir in 10 drops of lemon essential oil for a fresh scent. This combo cuts through grime effectively.
Here’s a breakdown of ingredients and their roles:
| Ingredient | Amount | Purpose |
|---|---|---|
| White Vinegar | 1 cup | Dissolves grease |
| Baking Soda | 1 tbsp | Abrasive cleaner |
| Lemon Essential Oil | 10 drops | Adds fresh scent |
| Water | ½ cup | Dilutes mixture |
| Bowl | 1 | Mixing container |
Apply Evenly Everywhere
Once you’ve mixed your powerful cleaning solution, grab a soft sponge or cloth to apply it across every inch of your sink.
Dip the sponge into the mixture, ensuring it’s saturated but not dripping. Start at the edges, working your way toward the center, and cover the basin thoroughly.
Don’t miss the faucet, handles, or drain—grime hides there too.
Use firm, circular motions to spread the solution evenly, tackling stubborn spots with extra care.
Make sure no area’s skipped; consistent application is key to breaking down grease and stains for a spotless, sparkling sink.
Let It Soak
After you’ve applied the cleaning solution across your sink, give it time to work its magic by letting it soak.
Don’t rush this step; allowing the solution to sit ensures it breaks down stubborn grime and stains effectively.
To maximize results, follow these soaking guidelines:
1. Set a Timer: Let it soak for 15-20 minutes.
2. Avoid Rinsing Early: Keep the solution undisturbed.
3. Check Problem Areas: Focus on spots with heavy buildup.
4. Stay Patient: Resist the urge to scrub prematurely.
This process guarantees the cleaner penetrates deeply, making your next steps effortless.
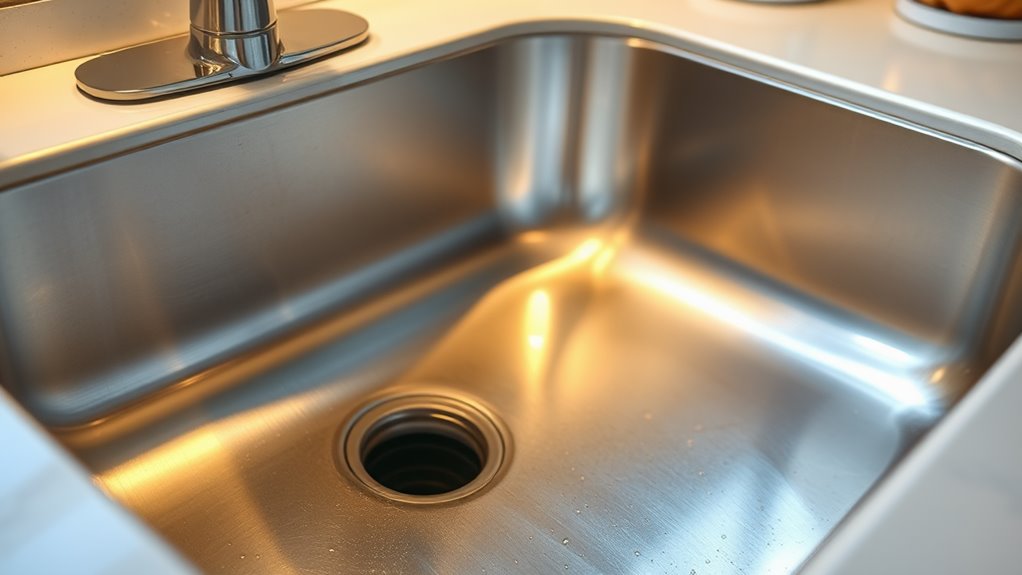
Scrubbing for a Spotless Finish
Why settle for a dull sink when you can achieve a dazzling shine with the right scrubbing technique? Grab a non-abrasive sponge or scrub pad and a mild dish soap to start.
Focus on stubborn stains by applying gentle pressure in circular motions, ensuring you cover every inch of the sink’s surface.
Pay extra attention to corners and around the drain where grime hides.
For tougher spots, sprinkle baking soda on your sponge for added grit.
Work methodically, and you’ll see the buildup disappear, leaving your sink spotless and gleaming with minimal effort.
Keep at it!
You can also use baking soda to help unclog your drain with a simple and effective method.
Rinsing and Drying Tips
Tackle the final step to a flawless sink by rinsing thoroughly with warm water.
Don’t let residue linger; ensure every corner gets a good flush to wash away cleaning product remnants and loosened debris.
Grab a clean, dry microfiber cloth for the next crucial task—drying.
Follow these precise drying tips for best results:
- Wipe Immediately: Don’t wait; dry right after rinsing to prevent water spots.
- Use Circular Motions: Buff gently to enhance shine.
- Target Edges: Focus on seams where water collects.
- Check Thoroughly: Ensure no damp spots remain for a pristine finish.
For an extra touch of brilliance, apply these techniques to nearby mirrors for a streak-free shine.
Maintaining the Shine Overnight
How can you keep that sink sparkling even while you sleep? It’s simple with a quick nighttime routine.
After rinsing and drying your sink, apply a thin layer of mineral oil or stainless steel polish to the surface.
Use a soft microfiber cloth to buff it in, creating a protective barrier against water spots and grime.
Then, place a dry towel over the sink to catch any stray drips overnight.
This prevents buildup and maintains that glossy finish.
For an added touch, sprinkle a few drops of essential oil in the sink to keep it smelling fresh and inviting.